
This guide provides internal technical staff with step-by-step instructions to deploy Docker-based services (such as DHCP) on a Mellanox 2010 switch. It includes file transfer methods from macOS and Windows, switch configuration, Docker container management, and DHCP configuration using a dnsmasq.conf file.
Prerequisites & Resources:
- Console or management port access to the Mellanox 2010 switch
- The docker images: diva_dhcp.gz & mnset.gz
- The configuration file specifying the DHCP ranges called dnsmasq.conf
The links above are to the Integrated Networks Dropbox with example configuration files. The red & blue config file indicitaded with either the dnsmasqr.conf or dnsmasqb.conf must be renamed to dnsmasq.conf before being copied to the switch. The local.conf & dnsmasq.hosts file should be imported directly to both the Red & Blue switches.
Section 1: File Transfer from macOS
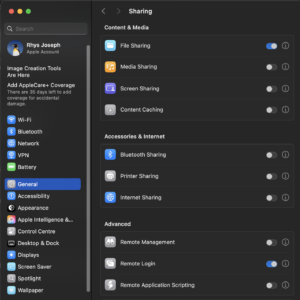
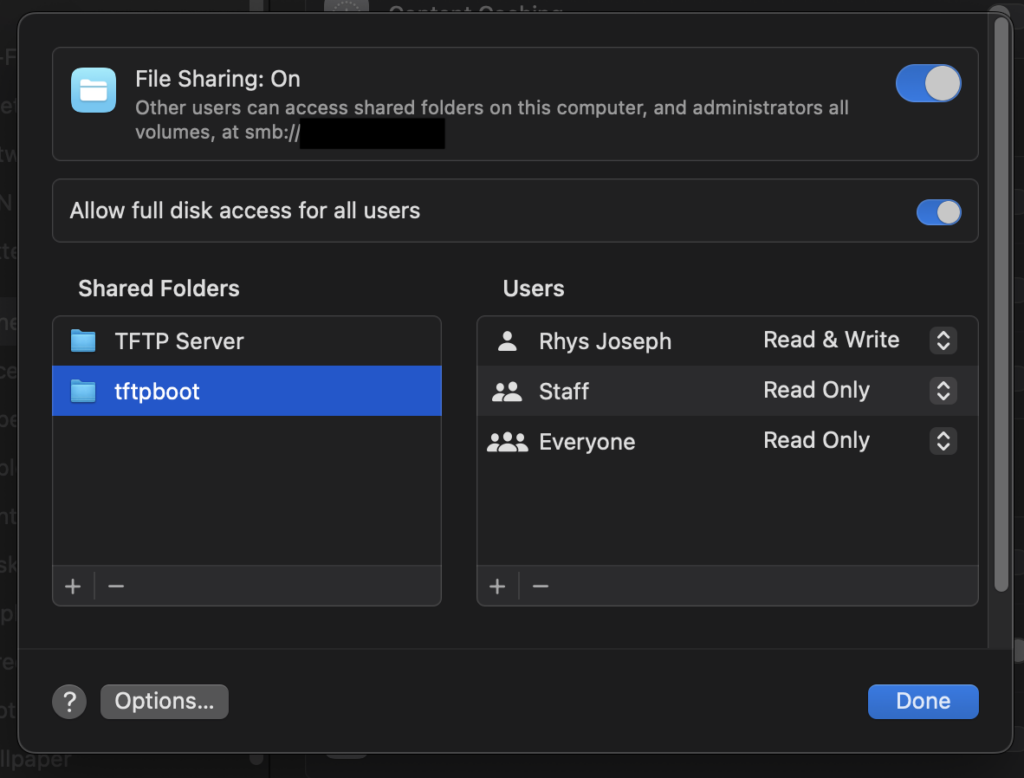
1: Enable File Sharing
- Go to System Settings > General > Sharing
- Toggle File Sharing to On
- Click the “i” icon
- Click + and add the folder containing the Docker images and configuration file (e.g. tftpboot)
- Click Done
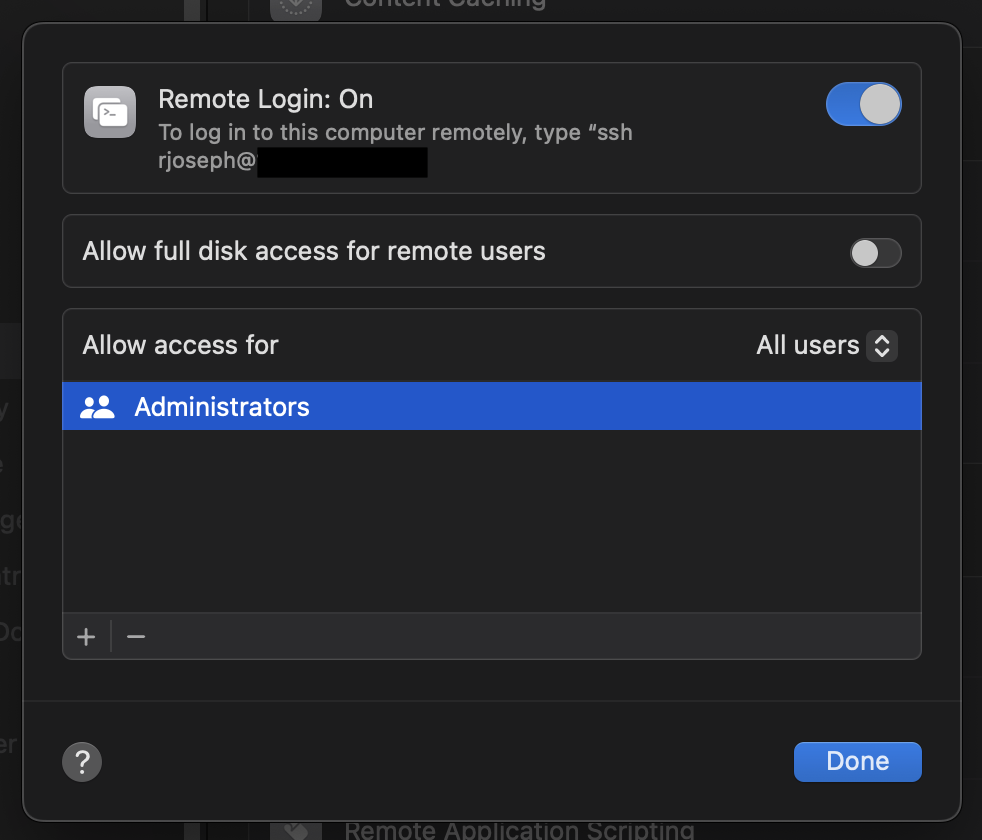
2. Enable Remote Login (SSH)
- Under Advanced, enable Remote Login. This allows SCP access, which is required for file transfer.
3. Configure the Mellanox Switch
- Connect via console (serial baud rate: 115200) or management port
- Run:
en
conf t
int mgmt0- Check or assign IP:
ip add 172.16.255.254 /24
exit
4. Setup Local Networking
- Connect an Ethernet cable from your Mac to the switch’s management port
- Set your Mac’s IP to an address in the 172.16.255.0/24 range
5. Transfer Docker Images via SCP
image fetch scp://<your-username>@172.16.255.200/<file-path>/diva_dhcp.gzimage fetch scp://<your-username>@172.16.255.200/<file-path>/mnset.5.70.7.img.tar.gz- Use your Mac user password when prompted
- Reboot the switch:
reboot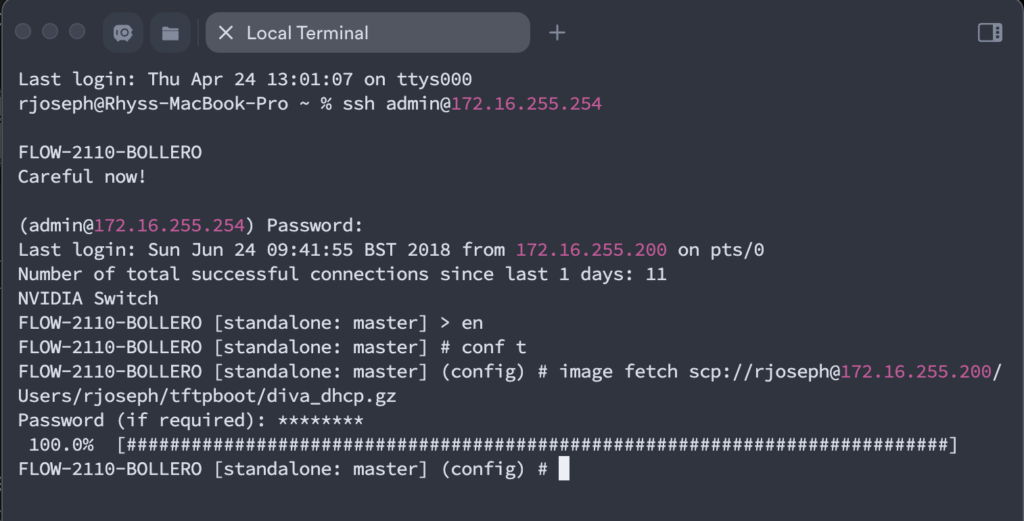
Section 2: File Transfer from Windows
1. Use TFTP instead of SCP
- Download and install Tftpd64
- Set Current Directory to your Docker image folder
- Choose the correct server interface (static IP in 172.16.255.0/24 range)
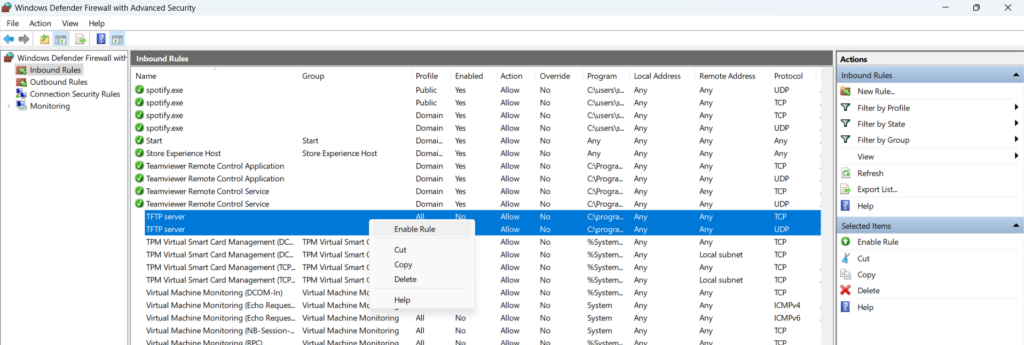
- Ensure Windows Defender Firewall allows inbound TFTP (TCP/UDP)

2. Transfer Docker Images via TFTP
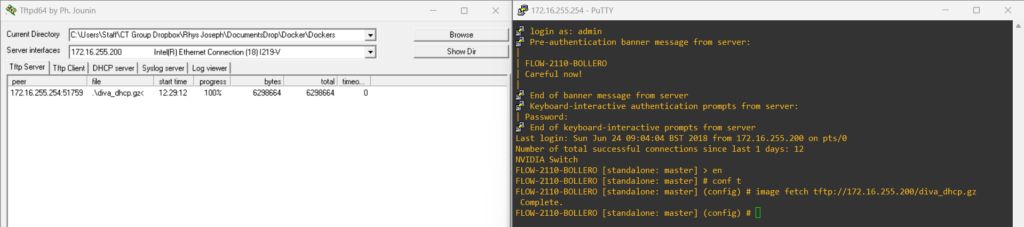
image fetch tftp://172.16.255.200/diva_dhcp.gz
image fetch tftp://172.16.255.200/mnset.gz
reboot
Section 3: Load Docker Containers and Create the DHCP Label
enable
conf t
docker no shutdown

docker load dhcp.gz

docker load mnset.gz

docker label dhcp

docker start ctlondon/diva_dhcp latest diva_dhcp now-and-init privileged network label dhcp

docker start image/mnset 5.70.7 mnset now-and-init privileged network

write memory
Section 4: Create a dnsmasq.conf File
If you already have a configuration file prepped, skip this step. If you do not have a configuration file prepped, you can follow the below guidance on how to create a dnsmasq.conf file with the appropriate DHCP ranges.
Single Port DHCP Configuration Example
interface=ethsl1p1.1
dhcp-range=10.20.1.2,10.20.1.2,255.255.255.252,30s
dhcp-option=ethsl1p1.1,3,10.20.1.1
The dnsmasq.conf file works by specifying for each interface the DHCP range, and any DHCP option settings such as a default gateway. For example the entry above is for Interface Ethernet 1/1, the DHCP range available to this interface is 10.20.1.2 to 10.20.1.2 (so only one IP address), and the subnet mask is 255.255.255.252 (which is a /30), and the IP address reserve settings are for 30s. Meaning that the dhcp server will be ready to reassign that IP address after 30 seconds of the IP address no longer being seen as active (say, if a device was disconnected from the port). This lets you quickly swap device from port to port, should you need to repatch.
The final line uses option “3” to override the default route supplied by dnsmasq and specifies instead for it to be the IP address 10.20.1.1 (which is the IP address of interface Ethernet 1/1 in this case).
The colours are for demonstration purposes only to make it easier to read and are not required.
VLAN DHCP Configuration Example
interface=swid0_eth.200
dhcp-range=10.20.200.100,10.20.200.200,255.255.255.0,12h
dhcp-option=swid0_eth.200,3,10.20.200.254
In the above example the interface is VLAN 200, the IP range is from 10.20.200.100 to 10.20.200.200, the subnet mask is 255.255.255.0 /24, the IP address will be reserved for 12 hours, & the default gateway is 10.20.200.254 (which will be the Switch Virtual Interface (SVI) IP address for VLAN 200)
Repeat for all interfaces needing DHCP.
To list available interfaces first load & start the dockers so they’re active, and then enter the following command:
enable
conf t
docker load diva_dhcp.gz
docker load mnset.gz
sh docker ps
enable
conf t
docker exec diva_dhcp bash
ip aAn example output is shown below with the interface & IP address highlighted to match with how the dnsmasq file is formatted:
bash-5.1# ip a

3: mgmt0: <BROADCAST,MULTICAST,UP,LOWER_UP> mtu 1500 qdisc noqueue master vrf_vrf-default state UP qlen 1000

    link/ether 10:70:fd:dc:05:cc brd ff:ff:ff:ff:ff:ff

    inet 172.16.255.254/24 brd 172.16.255.255 scope global mgmt0

       valid_lft forever preferred_lft forever

49: ethsl1p21: <NO-CARRIER,BROADCAST,MULTICAST,UP> mtu 9216 qdisc fq_codel state DOWN qlen 1000

    link/ether 90:0a:84:48:b5:88 brd ff:ff:ff:ff:ff:ff

51: swid0_eth.200@bridge: <BROADCAST,MULTICAST> mtu 9216 qdisc noop master vrf_vrf-default state DOWN qlen 1000

    link/ether 90:0a:84:48:b5:88 brd ff:ff:ff:ff:ff:ff

    inet 10.20.200.254/24 brd 10.20.200.255 scope global swid0_eth.200

       valid_lft forever preferred_lft forever

52: loopback0: <BROADCAST,MULTICAST,UP,LOWER_UP> mtu 1500 qdisc noqueue master vrf_vrf-default state UNKNOWN qlen 1000

    link/ether 96:c2:04:08:26:c5 brd ff:ff:ff:ff:ff:ff

    inet 10.255.1.1/32 scope global loopback0

       valid_lft forever preferred_lft forever
To exit from the docker container enter exit
Additional Logging Options (add to bottom of dnsmasq.conf file)
log-queries
log-dhcp
dhcp-sequential-ip
log-facility=/dhcp/dnsmasq.log
Save the configuration file with the exact file name dnsmasq.conf and move it to your sharing folder, we will now copy this file across to the switch.
A full reference of DNSMASQ syntax and functionality is available here & there are example configuration templates linked at the top of the article for the ST 2110 Flow Config, & the Bollero PTP switch config.
Section 5: Transfer dnsmasq.conf to Switch
The Mellanox switch has limited functionality allowing us to manage / move files around within its internal directories, so instead of pulling the config file as we have done for the docker containers, we are going to push the file to the specific folder via the terminal window on mac, or via the WinSCP application on windows.
From macOS using SCP
scp /<file-path>/dnsmasq.conf admin@172.16.255.254:/var/container_storage/dhcp/dnsmasq.conf

scp /<file-path>/local.conf admin@172.16.255.254:/var/container_storage/dhcp/local.conf

scp /<file-path>/dnsmasq.hosts admin@172.16.255.254:/var/container_storage/dhcp/dnsmasq.hosts
Enter switch password when prompted
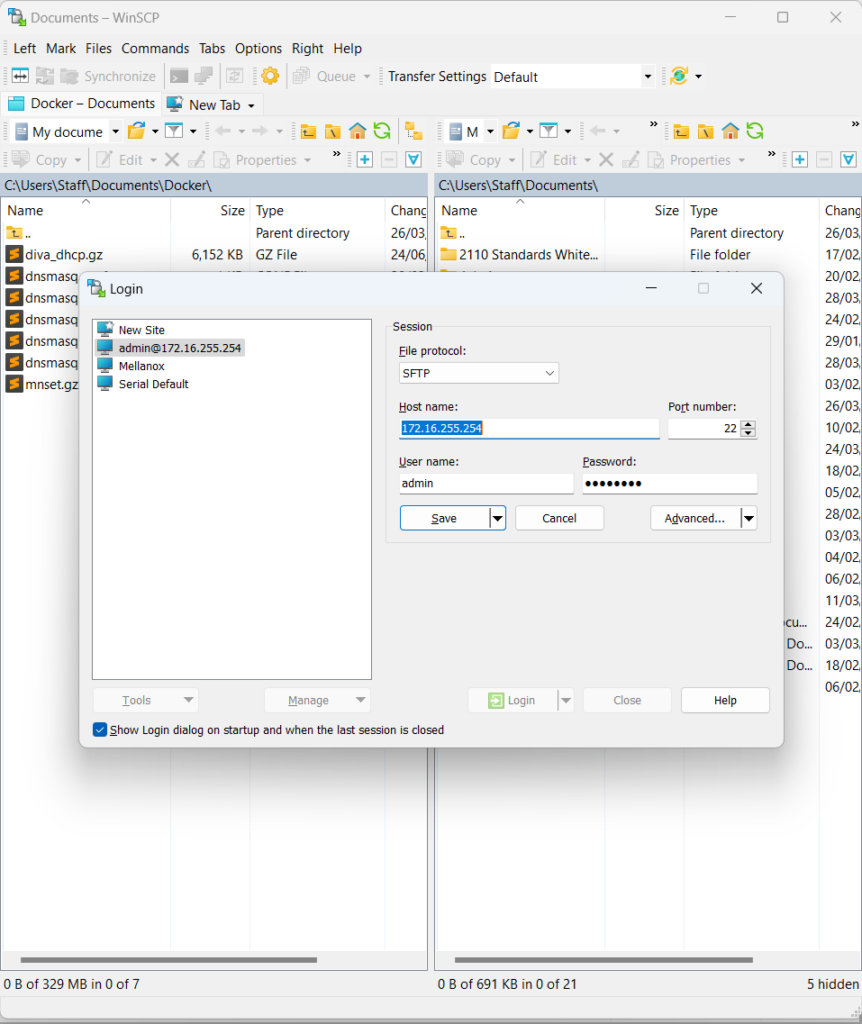
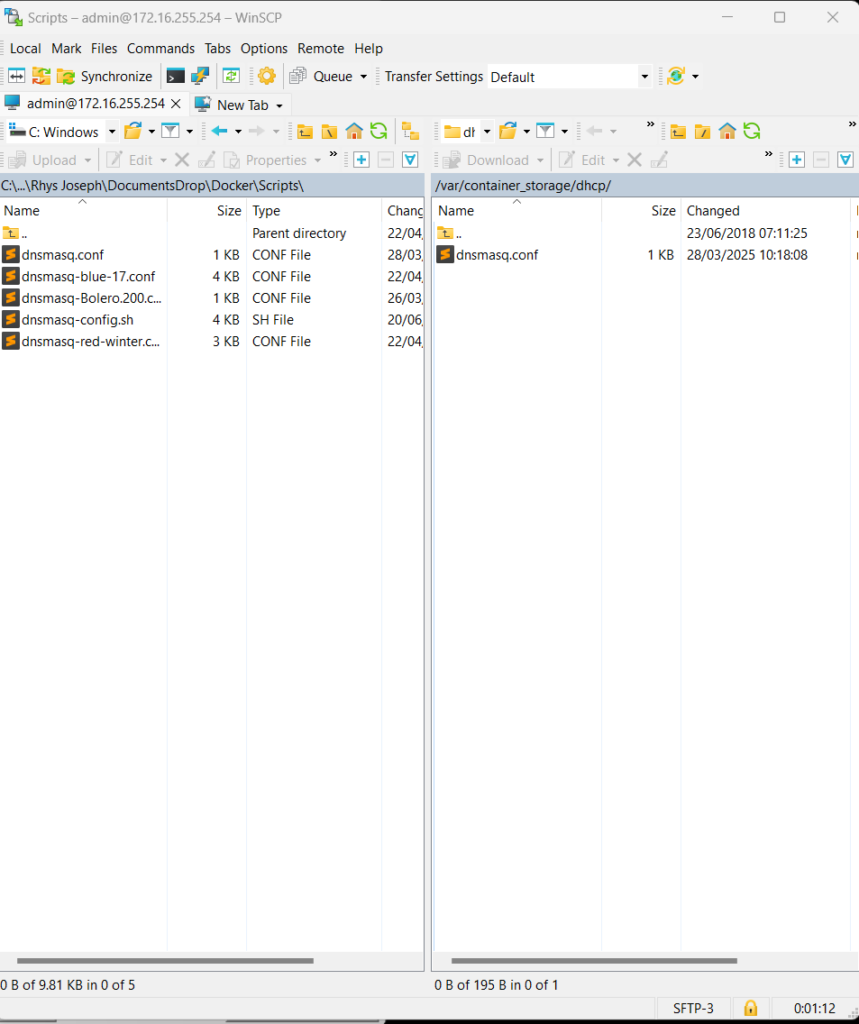
From Windows using WinSCP
- Install and open WinSCP
- Protocol: SFTP
- IP Address: 172.16.255.254
- Credentials:
This content is restricted1!
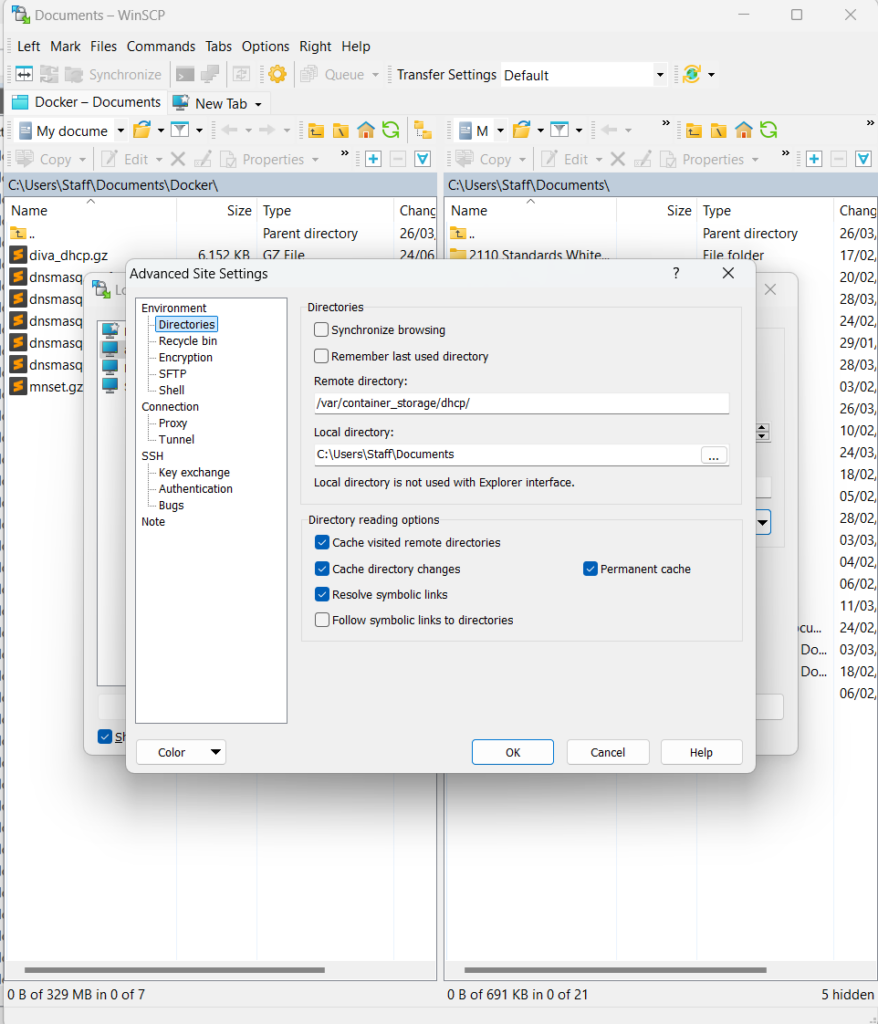
- Advanced
- Navigate to Directories > Remote Directory and enter:
/var/container_storage/dhcp/- Save
- Login
Drag `dnsmasq.conf`, `dnsmasq.hosts` & `local.conf` from local folder into remote panel
Section 6: Final Configuration and Verification
Once the dnsmasq.conf files are copied to the switch /var/container_storage/dhcp directory, restart the containers to apply the configuration
docker shut
no docker shut
The containers will take a few seconds to shut down and come back up, you can verify the containers have started again using the following command:
show docker psTest DHCP Functionality
- Connect a device to the switch and confirm it receives an IP address from the correct range.
Check Logs (if issues occur)
From macOS
scp admin@172.16.255.254:/var/container_storage/dhcp/dnsmasq.log /Users/<your-username>/<file-path>/dnsmasq.log 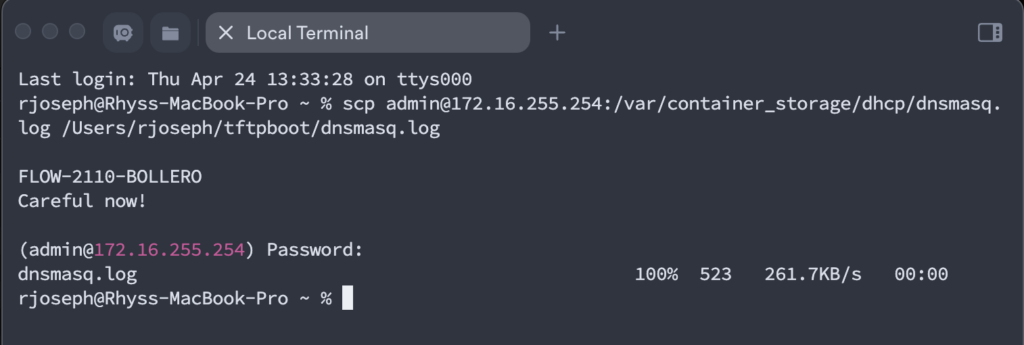
From Windows (WinSCP)
- Navigate to the same remote directory used earlier
- Download dnsmasq.log to your local machine
Review the log for errors such as “Interface not found” and verify the dnsmasq.conf syntax.
Completion
You have now successfully installed the MNSET & DNSMASQ containers, configured DHCP settings, and validated operation on the Mellanox 2010 switch using either macOS or Windows.
Leave a Reply
You must be logged in to post a comment.