
The following setup guide is to do with the Ravenna Expansion Card on the DirectOut Prodigy for use cases of converting ST-2110-30 streams to and from Dante.
This is the home page where you will set up your streams and a few other options. 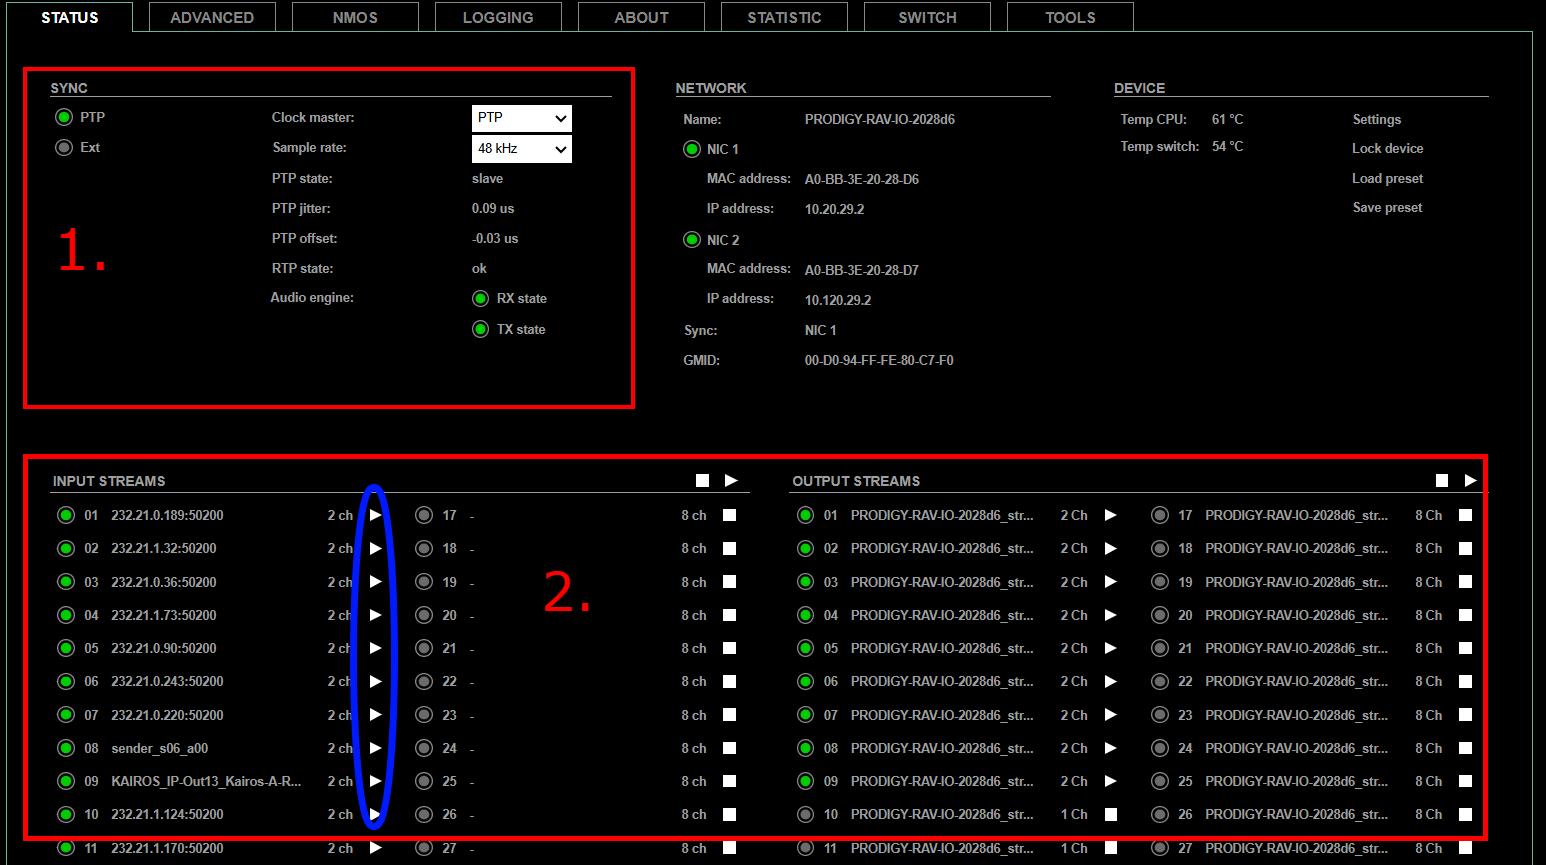
- Since we primarily run PTP on this system make sure that this option is selected. Sample rate should match the audio on your event.
- Input streams are your 2110 -> Dante Streams and vice versa, a nice thing about using prodigy is you don’t need to strip the audio from your video streams, just send the whole source and the video will automatically be stripped leaving 2110 with just the audio.
!! The blue circle over the play button might seem basic but it is actually a life saver, if you’re having an issue where you’ve logically proved audio is reaching the prodigy in the right spot but you hear nothing this is related to an NMOS issue. With other devices you would just do a simple NMOS refresh however to do this on Prodigy requires a reboot… which isn’t great in a Live environment. Instead, just toggle the stream off with this button and wait 10 seconds and press play again.
Clicking on an Input stream will open your 2110->Dante page.
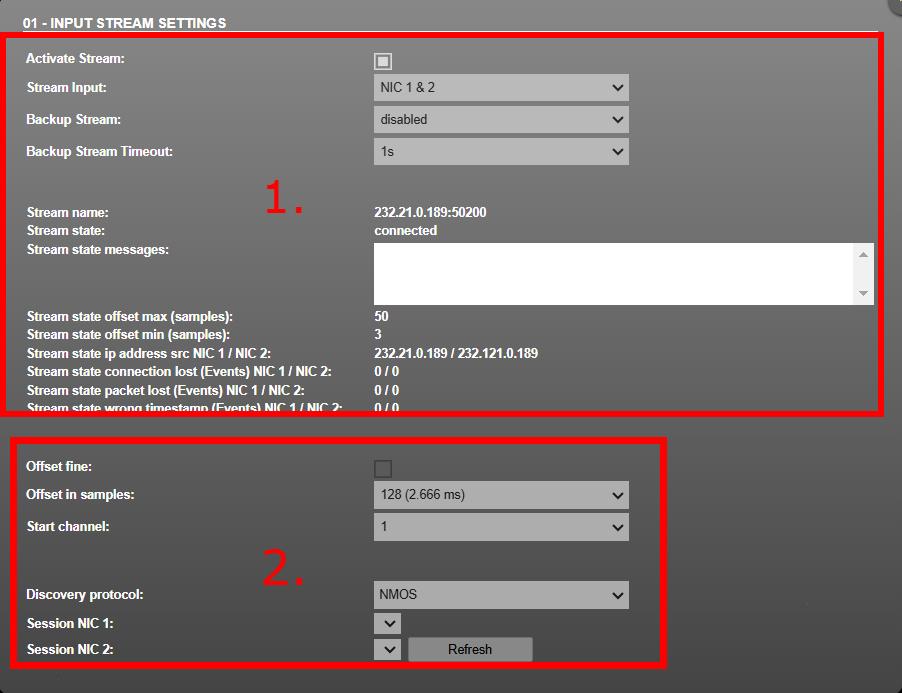
- To edit settings, you will have to turn the stream off, when you’ve done this you will not be able to turn it back on, to re-enable the stream send the source back to this input and it will be enabled again.
Select NIC 1&2 which allows you to have redundancy and leave backup streams off, this is for select a separate stream to fail over to this. Below this you will see your stream details of the routed source from 2110 which is useful for troubleshooting. - Offset in samples – If your routed source is erroring with an RTP related issue, increasing the offset in samples will hopefully fix this issue.
Start Channel will want to be incrementally increased, for example if input 1 you want two channels of audio you will start on 1. Input 2 will then start on 3 but let’s say this needs three channels in which case Input 3 will start on 6 and so on.
Set discovery protocol to NMOS and press refresh.
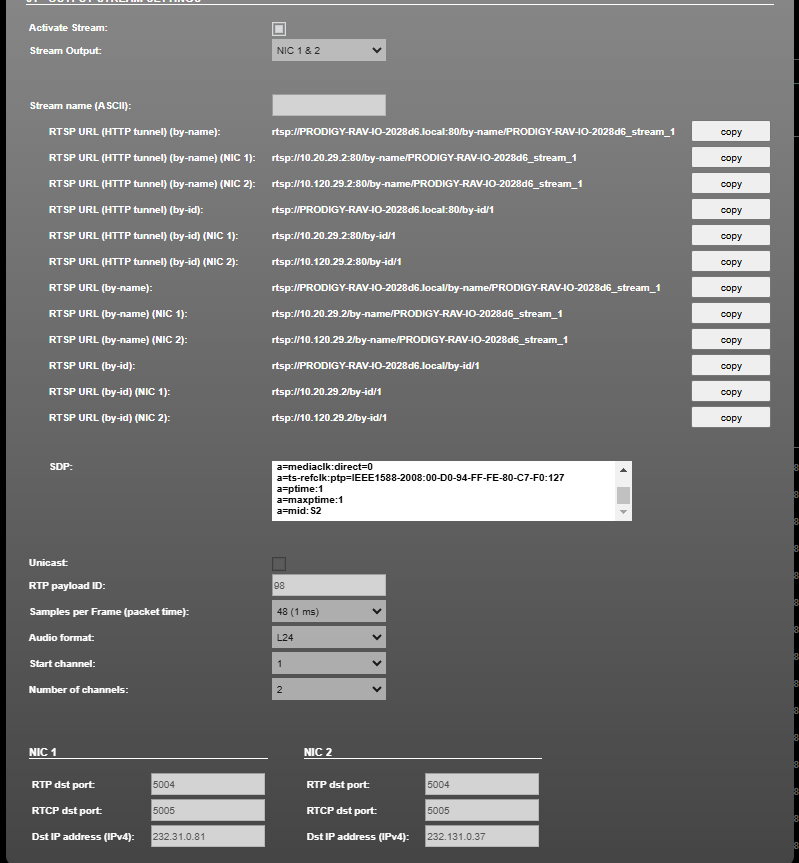
Here you will set up your output settings, firstly to change options the stream must be off first. Select NIC 1 & 2 at the top if using a redundant network, this will allow the prodigy to patch sources into the SDP box and also fill the multicast IP at the bottom for both red/blue networks. It’s also important to set your sample rate here (44.1hz/48hz etc) that you’re using for your show. Select the starting channel like you did for the input settings just on the flip side for the 2110 -> Dante to patch to.
!! If you are having an error along the lines of RTP packets lost or similar, try increasing the RTP payload or just messing around with it. There is not a lot of information about why it does this but this is how we’ve dealt with it. !!
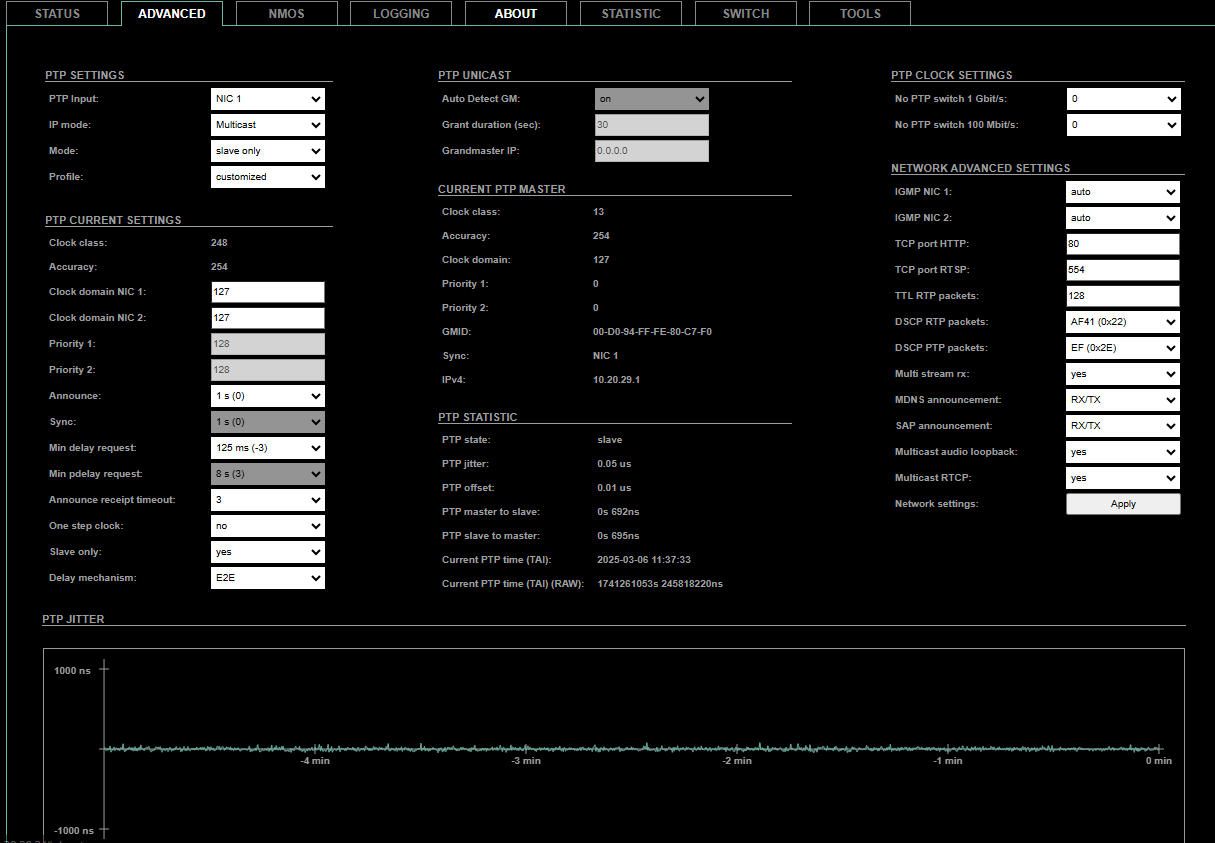
This is the advanced page, here we will find important PTP settings on the left. In our setup we only had PTP set to receive from NIC 1, because we were unsure on how it decided where to get PTP on a redundant setup with NICs 1 & 2 but I’m sure you could get this to work.
Set your clock domains to match your GM’s domain and other PTP settings like announce intervals and delay requests, you can use the jitter graph to understand . Other than these few settings there shouldn’t be a need to change anything else unless required to.
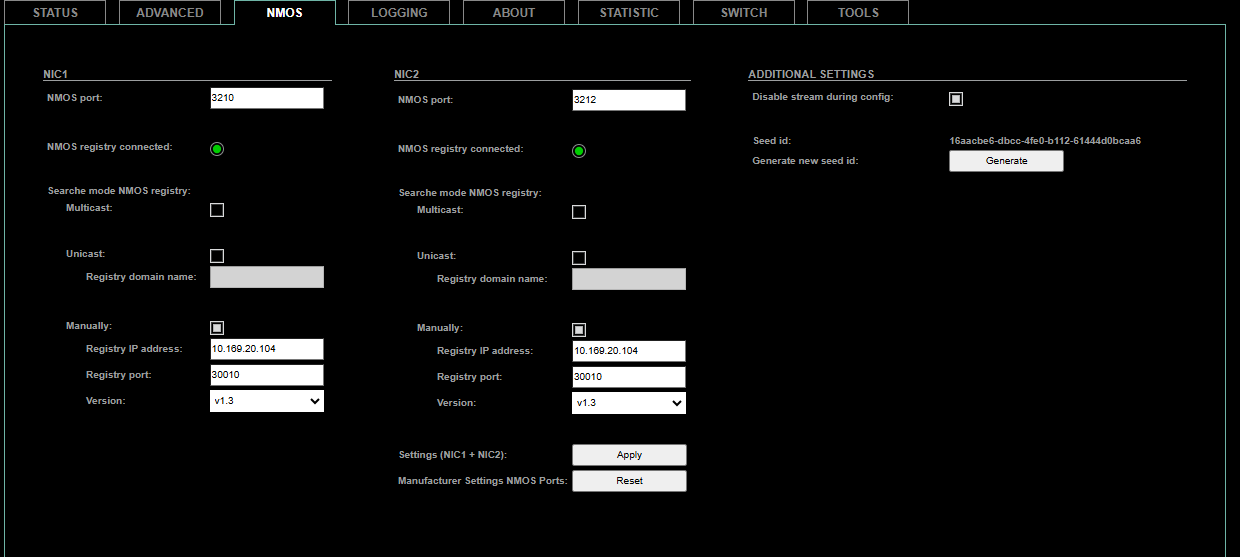
NMOS settings are best to manually set for each NIC, the automatic registry into Hi didn’t really work. Go ahead and select manual and add the registry of your NMOS control system, registry port and NMOS version.
That’s mostly it for the Ravenna set up of a Prodigy, there is a page called ports but it’s a bit confusing and best to leave NIC 1 to Port 1 and NIC 2 to Port 2. You will need to download Globcon and go into the Dante side of the Prodigy to do your cross patching.
Leave a Reply
You must be logged in to post a comment.