
CT have created a default Hyper-V virtual machine to act as a Zabbix proxy on site. Here’s how to deploy it.
We recommend using Hyper-V to run the proxy so you can take checkpoints and revert back to saved working instances should anything go wrong. Hyper-V is a free feature built in to Windows and can be enabled by searching for ‘features’ from the Start menu and following the wizard to add the new feature. You will need to ensure that virtualisation is enabled in your PC’s BIOS, and the install will require a restart.
Once installed, open Hyper-V Manager. Hyper-V is not good at being backwards compatible. This VM was created on version 0.0.19041.1 so you will need to check Help -> About Hyper-V Manager for the version of Hyper-V you are running. It must be 10.0.19041.1 or higher to import the VM.
In Hyper-V Manager, check you have a virtual switch available in Virtual Switch Manager to ‘plug’ the VM into. If there are no virtual switches listed, create a new external switch, celetcing External, the correct physical network interface and making sure ‘Allow management operating system to share this network adaptor’ is ticked.
Download the standard CT Zabbix Proxy VM from the link below. Once downloaded, unzip the folder.
This has been updated to include the fix of the crashing issue during an apt-update.
Select Action -> Import virtual machine to open the import wizard.
When prompted, select the ‘Virtual machines’ folder inside your unzipped VM image folder, then select to ‘Copy the virtual machine’. If your Virtual Switch is named differently from the default, you will be presented with a warning that the switch cannot be found. Simply select your virtual switch from the drop down list.
Once imported, double click on the VM to start it.
The proxy will start in its default configuration which you need to change. Log in with the credentials administrator and Creat1ve.
Firstly, if you are running a complex job it is good practice to change the operating system’s hostname to make it clear which VM you are logged into.
sudo hostnamectl set-hostname <your-new-hostname>As this is the default VM, you need to change a the name so it can be identified properly by the server.
sudo nano /etc/zabbix/zabbix_proxy.confOn line 42, edit the Hostname= parameter to something unique for your show. This name cannot contain spaces or special characters other than hyphens. Save and exit by pressing ctrl-X and then type y to okay the save. As we have changed the configuration, the proxy service needs to be restarted to apply the changes.
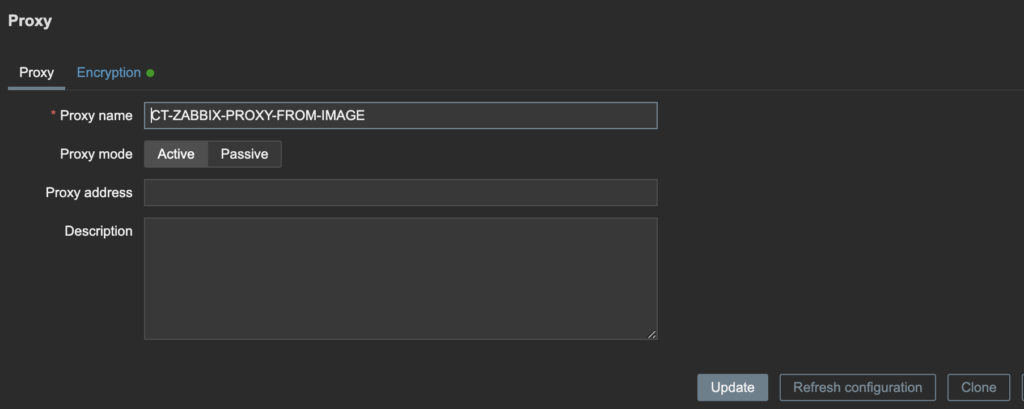
sudo service zabbix-proxy restartLog in to monitoring.ctlondon.com and navigate to Administration -> Proxies. Select CT-ZABBIX-PROXY-FROM-IMAGE from the list of proxies. Click Clone. Rename this clone to exactly match the Hostname you set in the config file. It mush match EXACTLY. Once changed, click Add.
Your proxy should now appear in the list of proxies with a ‘Last seen’ time of a few seconds.
Leave a Reply
You must be logged in to post a comment.