Factory resetting the IP Ninjar units will return their IP address settings of to the defaults below.
NJR-T01UHD & R01UHD
Default: DHCP
NJR-CTB Controller
“LAN” port for 10G network side Default: DHCP
“Maintenance” port for Control network side Default: 192.168.1.199
Once units and CTB LAN port are connected to same network segment they are automatically assigns ip address by using a Link Local Protocol.
The IP address range will be “169.254.0.0/16” range. If there are no specific reason to assigning fixed ip addresses it is better practice to leave the units as DHCP so that units can be recognised by CTB automatically making it plug&play. If there is DHCP server on the 10G network, DHCP will assign IP addresses so that please confirm assigned IP address by checking on the DHCP server.
Assigning Static IP Addresses
1. Change IP address setting of each unit first
2. When the unit IP address is changed the CTB cannot recognise the unit as the network segment will now be different be different.
3. After all unit IP addresses are changed, please change ip address of LAN port of CTB to same network segment as units (fixed IP address)
4. You can then see all units correctly.
10GB Switch Settings
If you are using a single switch the following settings should be applied.
– IGMP Snooping enabled
– Multicast fast leave enabled
One another thing is that depending on switch you use, sometimes it may need to have an ACL setting to block the 225.225.225.225 multicast address to reach each unit.
This is the SDVoE specific mulitcast address and is used to recognise the system “mode”. Either network or P2P (point-to-point).
Usually, if IGMP Snooping is enabled, this 225.225.225.225 multicast stream is filtered by switch however if the units appear in P2P mode, this address is not being filtered. Some switches, like Cisco and HP, forward this 225.225.225.225 multicast stream as “unregistered multicast packets” automatically even if IGMP snooping is enabled. In this case you need to put ACL to filter this 225.225.225.225 packets. Detailed instructions on setting this up on Cisco CBS series switches are included below.
If you use NetGear switch, it will filter 225.225.225.225 whenever IGMP snooping is enabled.
Preferred System Configurations


Setting up Cisco CBS Switches for IDK Ninjars
Create a VLAN for the Ninjars. In this example we are using VLAN 12. Give the switch an IPv4 interface on this VLAN with an IP address within the subnet of your Ninjars. In this example, the switch’s interface on VLAN 12 is 172.16.16.1.
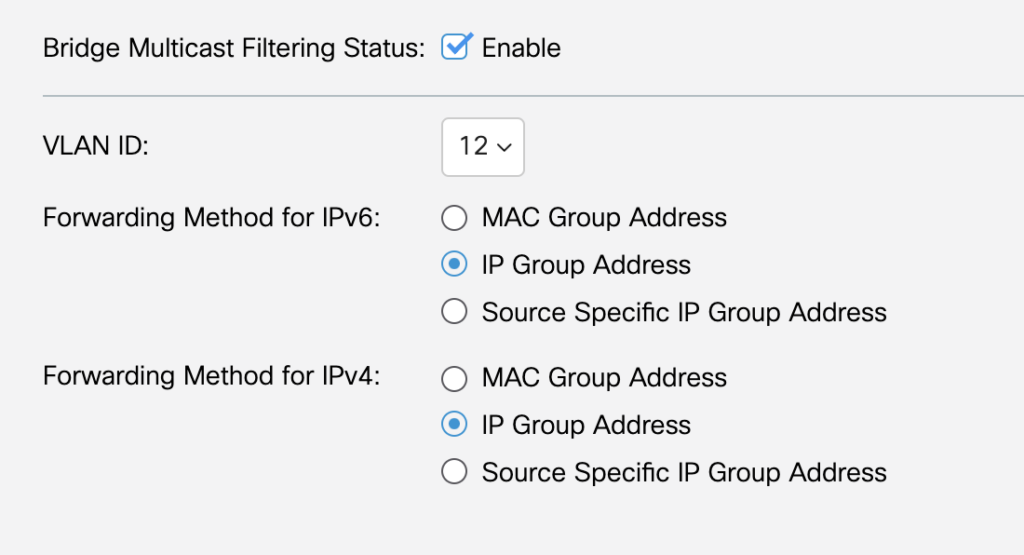
Start by opening the Multicast setting (note that you may need to be in Advanced settings, rather than Basic for some of these options. Change the mode in the top right of the web page). Navigate to Multicast -> Properties. Enable Bridge Multicast Filtering globally on the switch and set your VLAN to filter and forward by IP Group.
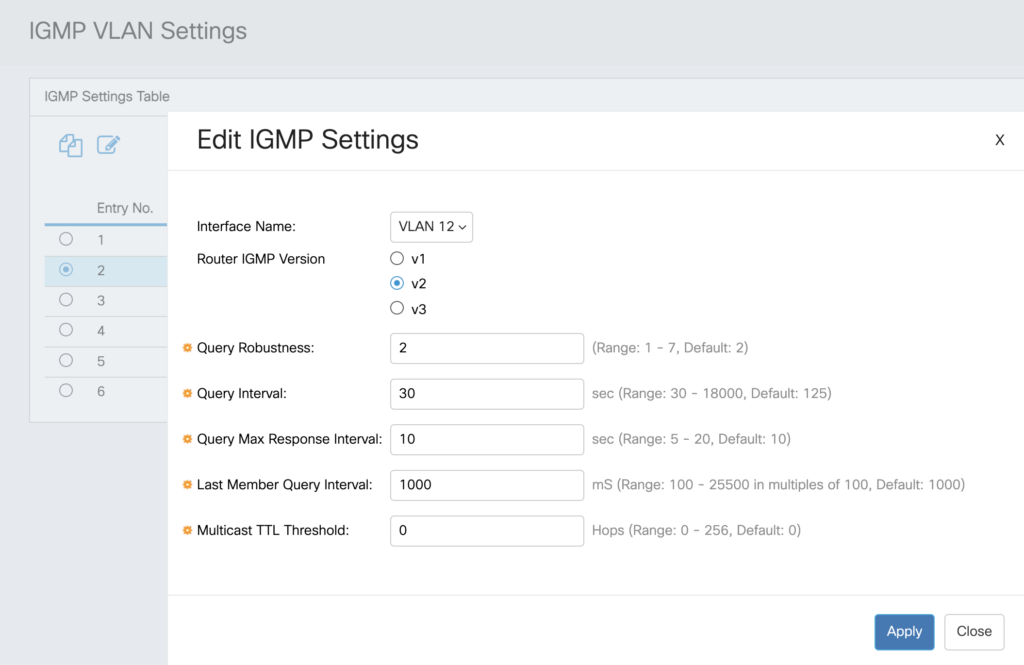
Navigate to Multicast -> IPv4 Multicast Configuration -> IGMP Snooping and enable both IGMP Snooping and IGMP Querying. On the same page, select your VLAN and click the Edit icon. Set the version to v2 and the Query Interval to 30 seconds
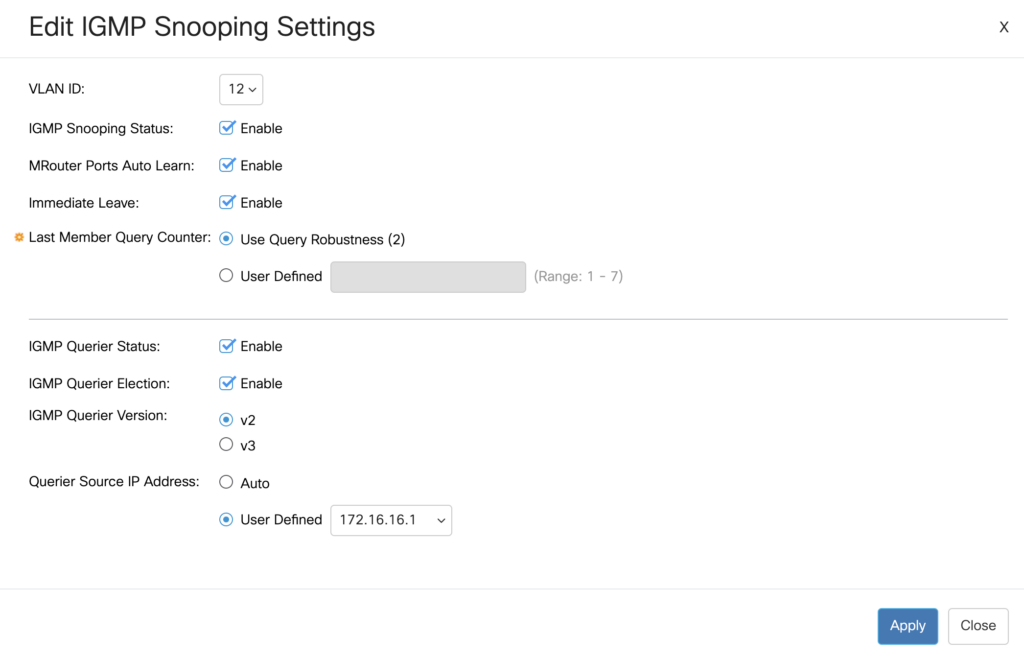
Next head to Multicast -> IPv4 Multicast Configuration -> IGMP VLAN Settings. Select your VLAN and click the Edit icon. Ensure that IGMP Snooping Status is enabled, along with MRouter Ports Auto Learn and Immediate Leave. Enable the Querier and Querier Election, setting the source IP Address as the IP address of your switch.
If you are using more than one CBS switch in your Ninjar setup, only one needs to be the querier. Although it seems wrong, you still need to enable the querier and query election on this switch, but leave the Querier Source IP Address as Auto.
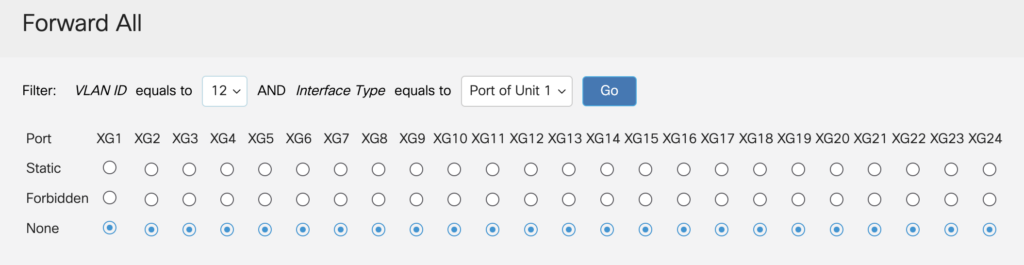
The final two multicast settings to configure are Forward All and Unregistered Multicast. The Unregistered Multicast setting is applied to the physical interfaces and not the VLANs so care should be taken if the switch is being used by other services or systems, or are part of a bigger network. For instance, these settings have an affect if using Dante Virtual Soundcard or RTS OMNEO systems. Unregistered Multicast should be be set to Filtering, and Forward All should be set to None for your VLAN.

As noted above, the Ninjars use the multicast address 225.225.225.225 to determine if they are on a network, or point to point. If a unit receives a packet on this address it assumes it is in P2P mode and disappears from the network. The link lights will keep flashing at this point, but the units will not appear in the MAC address table of the switch. To prevent this, this multicast IP needs to be blocked so any packets are dropped at the interface before they can be switched across the network.
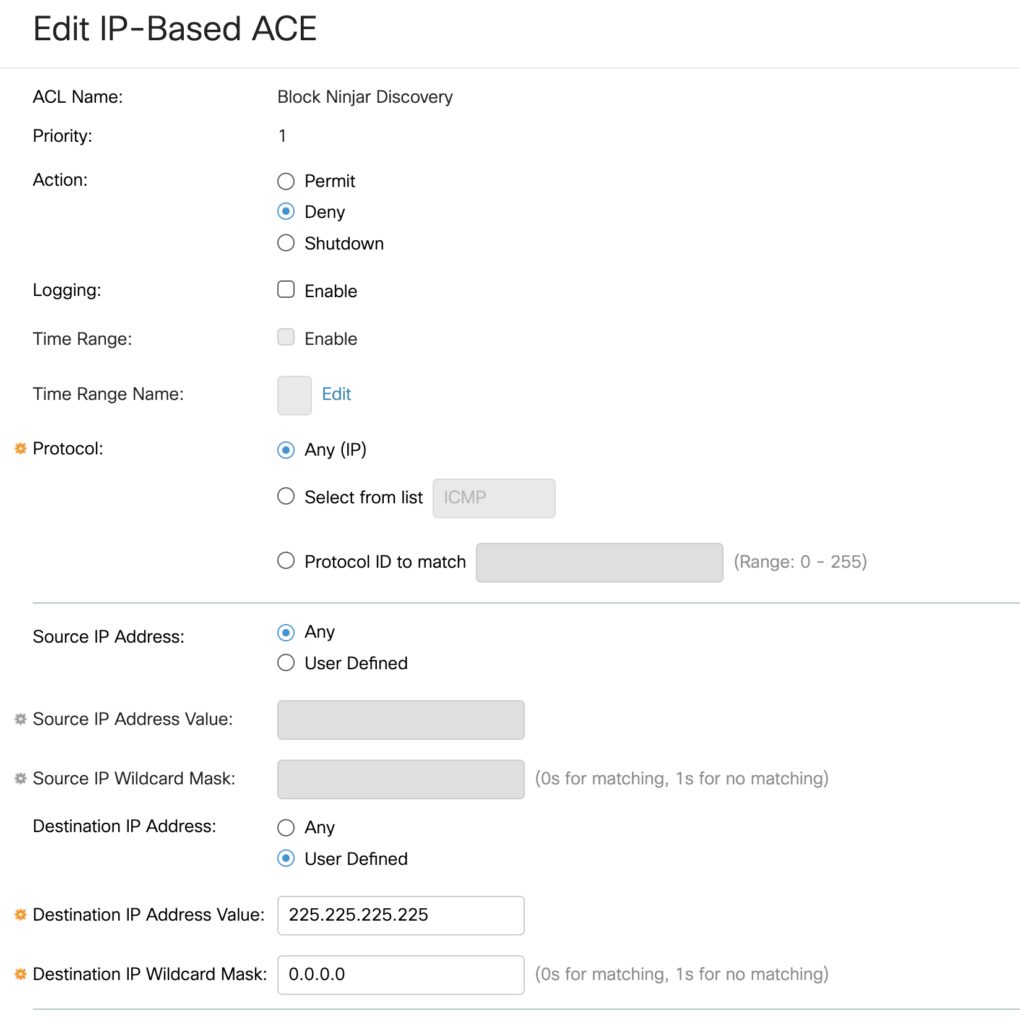
Navigate to Access Control -> IPv4-Based ACL. Click the + icon and give the new Access Control List a friendly name. For this example we are calling it Block Ninjar Discover.
We now need to add two Access Control Entries to the new Access Control List. The first blocks any traffic destined for the IP address 225.225.225.225. The rule should be given a priority of 1 and the action should be to Deny any protocol from any source that is destined from 225.225.225.225.
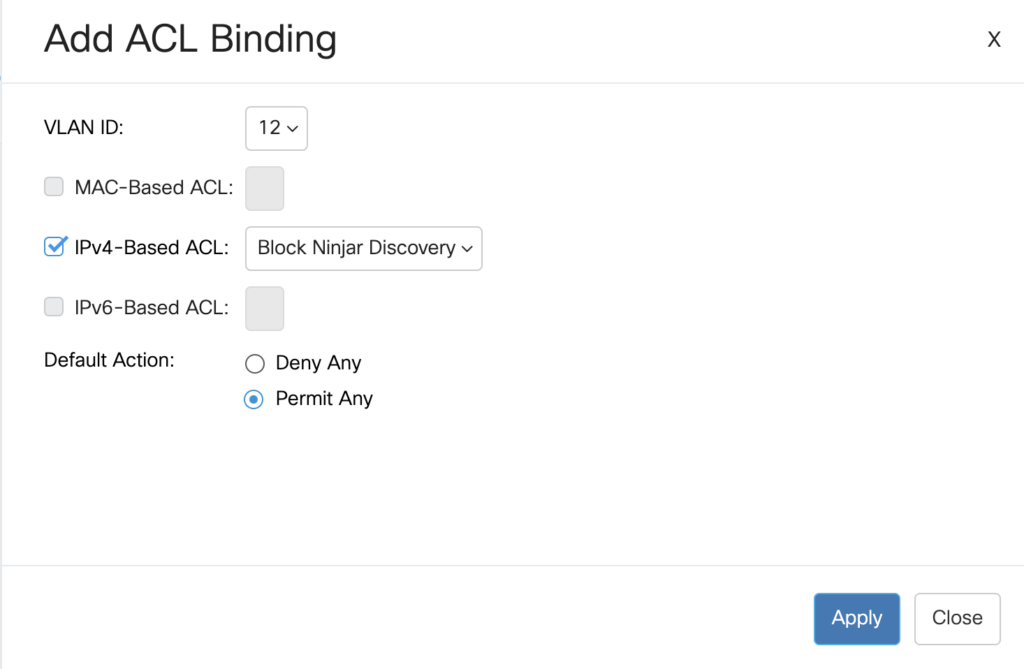
The new ACL needs to be applied to the Ninjar VLAN to block their discover multicast address. Head to Access Control -> ACL Binding (VLAN) and bind the ACL we created to the Ninjar VLAN. Ensure the Default Action is set to Permit otherwise all other traffic will be dropped, meaning no traffic is passed on that VLAN.
Leave a Reply
You must be logged in to post a comment.