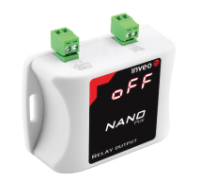
Inveo NanoOut units are PoE powered, network controlled relays that can be triggered either via their internal webpage or by StreamDeck.
Other models are available, have a look at their website.

Setting Up the NanoOut
Full instructions for the NanoOuts can be found here but a quick guide is written below to speed things up.
Pressing the reset button will display the current IP address of the unit. Web to this address to access the administration pages of the device. If you perform a full factory reset the unit will default to 192.168.111.15 and you can log in with admin / admin00
Navigate to the Administration tab. Ensure ‘Enable Program Access’ is checked as this allows the unit to receive external commands.
Under the Channel menu, set the how you want the relay to operate. The first example will turn the relay on as soon as a command is received, it will then stay on for 200ms before automatically switching off.

In this example, the relay requires the command to be send for 1000ms before switching on for 200ms. This means the operator would have to hold the button down for a second before the relay triggers.

In this example, the relay will stay on until it receives a command to turn off. This setting should be used if the relay should stay on as long as the StreamDeck button is pressed.

Configuring Companion
Add a new instance of Generic -> Generic TCP & UDP Request. Ignore the warnings that this should only be used as a last resort. Set the Target IP to the IP of the NanoOut, set the port number 9761 and the connection type to TCP. This will work with UDP too but may be less reliable.

Add the instance to a button and add the following commands:
Key down -> %0f%01%00%ff%01%fe%11%00%00%00%1f
Key up -> %0f%01%00%ff%00%ff%11%00%00%00%1f
You only need to add the key up command if you have set the unit to bistable mode, meaning the relay will stay on as long as the StreamDeck button is pressed. If in doubt, add both as the second command will not affect operation.


Leave a Reply
You must be logged in to post a comment.